This guide provides basic steps for installing the necessary Windows Server 2012 R2 operating system prerequisites for the Microsoft Exchange 2013 Mailbox and Client Access server roles on a single Windows 2012 R2 Server.
This guide comes with comprehensive functional components that are required to deploy Exchange 2013 and based on practical design principles that have been tested by Geneva Sibanda in his line of work as designer and implement new solutions based on business requirements of practical IT solutions for top blue-chip companies listed at Johannesburg Stock Exchange (JSE).
NB: For Microsoft Exchange 2013, there have been major architectural changes to the Exchange server roles. Instead of the five server roles that were present in Exchange 2007 and Exchange 2010, in Exchange 2013, the number of server roles has been reduced to two: the Client Access server and the Mailbox server.
This guide is for administrators who install, configure, and It assumes that you have the following skills and knowledge:
Assumed Knowledge and proficiency in the following Microsoft server technologies:
• Active Directory Domain Services
• Active Directory Federation Services (ADFS)
• Microsoft Exchange 2010/2007/2003/2000 or 5.5
• Microsoft Networking
• DNS
• Windows PowerShell
Before you being to install Exchange 2013 make sure that your Active Directory Environment meets the following requirements:
The functional level of your forest is at least Windows Server 2003, and that the schema master is running Windows Server 2003 with Service Pack 2 or later.
• Your Windows 2012 R2 Server OS is indeed fully installed and no stories.
• IP Address Statically Assigned.
• You must first join the server to the appropriate internal Active Directory forest and domain.
• For security reasons, Install the latest Windows updates on your Windows 2012 R2 Server.
After you’re satisfied with the listed above, complete the following steps to install the Remote Tools Administration Pack. After you’ve installed the Remote Tools Administration Pack you’ll be able to use the server to prepare Active Directory.
1. Open Windows PowerShell in Run as Administrator mode, and run the following command.
2. The Remote Tools Administration Pack.
Install-WindowsFeature RSAT-ADDS

Import-Module ServerManager

Install-WindowsFeature AS-HTTP-Activation, Desktop-Experience, NET-Framework-45-Features, RPC-over-HTTP-proxy, RSAT-Clustering, RSAT-Clustering-CmdInterface, Web-Mgmt-Console, WAS-Process-Model, Web-Asp-Net45, Web-Basic-Auth, Web-Client-Auth, Web-Digest-Auth, Web-Dir-Browsing, Web-Dyn-Compression, Web-Http-Errors, Web-Http-Logging, Web-Http-Redirect, Web-Http-Tracing, Web-ISAPI-Ext, Web-ISAPI-Filter, Web-Lgcy-Mgmt-Console, Web-Metabase, Web-Mgmt-Console, Web-Mgmt-Service, Web-Net-Ext45, Web-Request-Monitor, Web-Server, Web-Stat-Compression, Web-Static-Content, Web-Windows-Auth, Web-WMI, Windows-Identity-Foundation

Now go ahead and run command
Restart-computer

After you’ve installed the operating system roles and features needed on your Windows 2012 R2 Server, download and install the following software in the order shown:
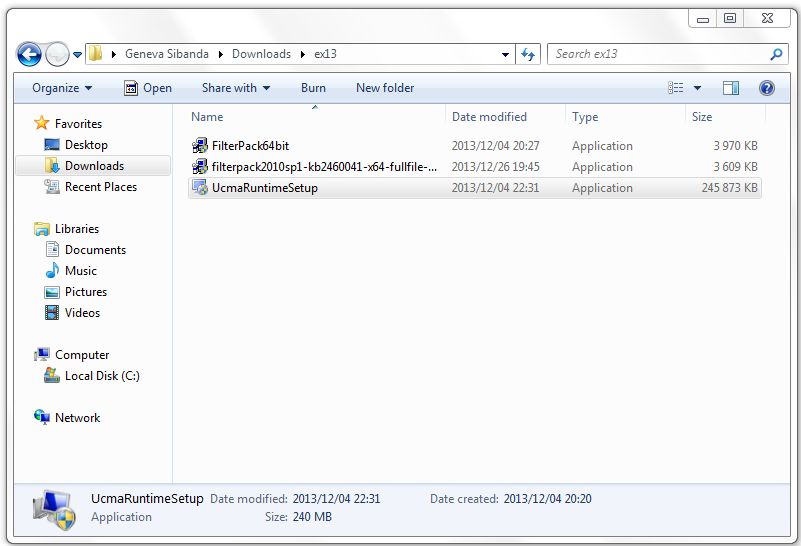
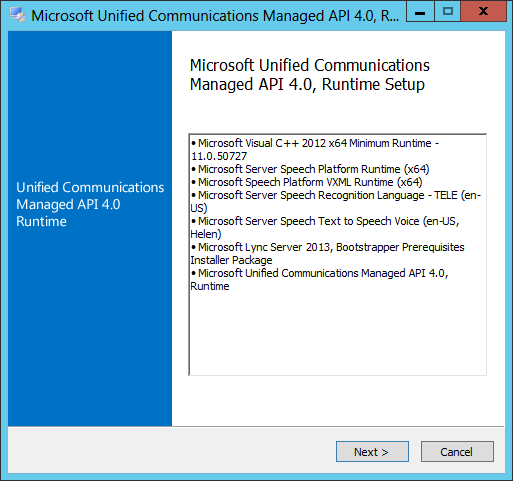
1. Microsoft Unified Communications Managed API 4.0, Core Runtime 64-bit
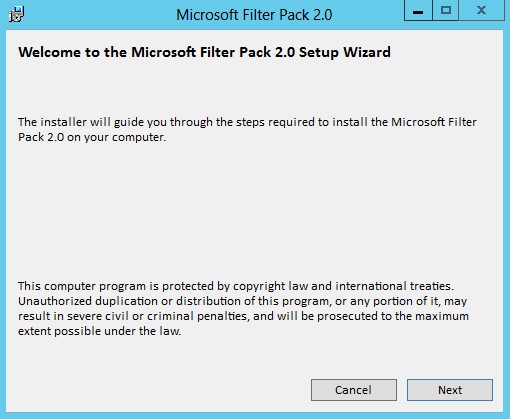
2. Microsoft Office 2010 Filter Pack 64 bit
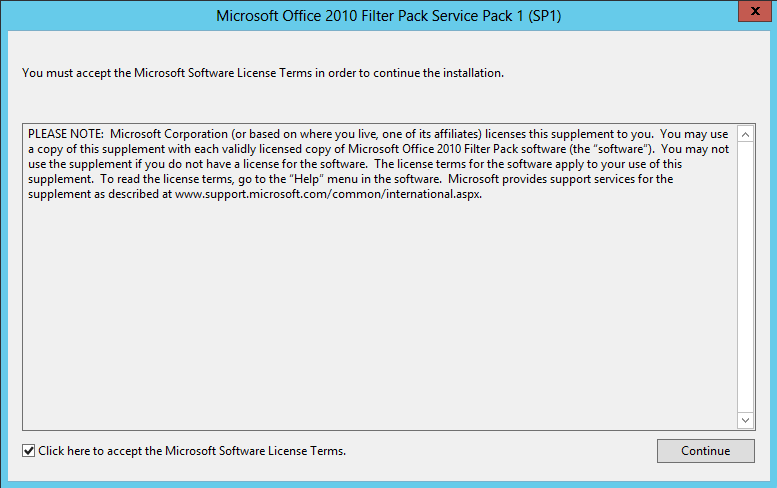
3. Microsoft Office 2010 Filter Pack SP1 64 bit
Active Directory Preparetion:
Now we need to get Active Directory Environment ready for the Exchange 2013 installation.
In your powershell window navigate to the directory location of the Exchange 2013 installation files.

PS C:\Software\Exchange\ex13> .\setup /Preparead /IAcceptExchangeServerLicenseTerms /OrganizationName:”ESGNET”
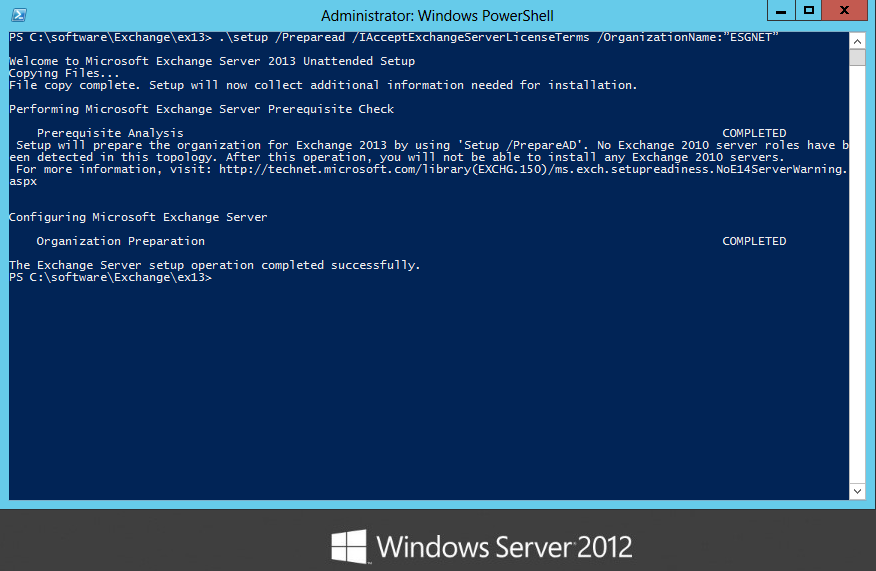
Welcome to Microsoft Exchange Server 2013 Unattended Setup
Copying Files…
File copy complete. Setup will now collect additional information needed for installation.
Performing Microsoft Exchange Server Prerequisite Check
Prerequisite Analysis COMPLETED
Setup will prepare the organization for Exchange 2013 by using ‘Setup /PrepareAD’. No Exchange 2010 server roles have been detected in this topology. After this operation, you will not be able to install any Exchange 2010 servers.
For more information, visit: http://technet.microsoft.com/library(EXCHG.150)/ms.exch.setupreadiness.NoE14ServerWarning.aspx
Configuring Microsoft Exchange Server
Organization Preparation COMPLETED
The Exchange Server setup operation completed successfully.
PS C:\Software\Exchange\ex13>
PS C:\Software\Exchange\ex13> .\setup /PrepareSchema /IAcceptExchangeServerLicenseTerms
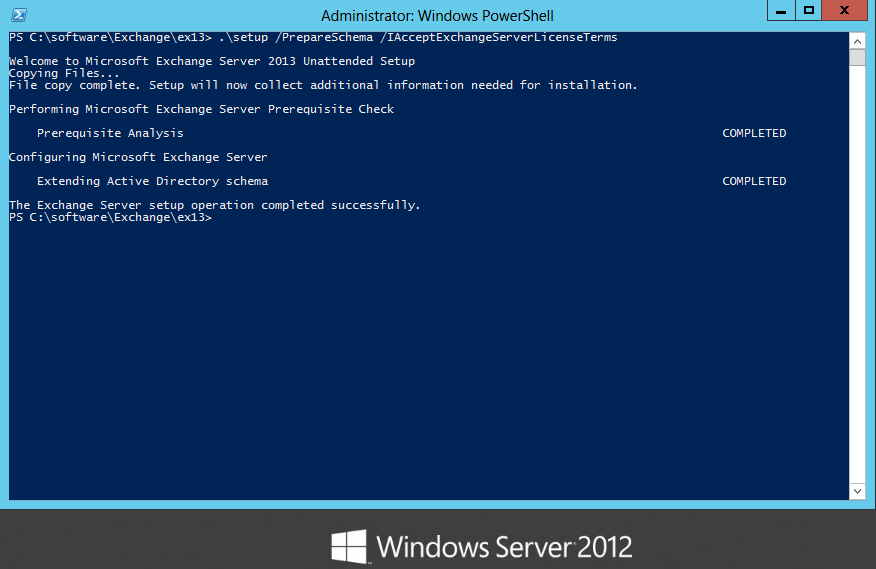
Welcome to Microsoft Exchange Server 2013 Unattended Setup
Copying Files…
File copy complete. Setup will now collect additional information needed for installation.
Performing Microsoft Exchange Server Prerequisite Check
Prerequisite Analysis COMPLETED
Configuring Microsoft Exchange Server
Extending Active Directory schema COMPLETED
The Exchange Server setup operation completed successfully.
PS C:\Software\Exchange\ex13> .\setup /Preparedomain /IAcceptExchangeServerLicenseTerms
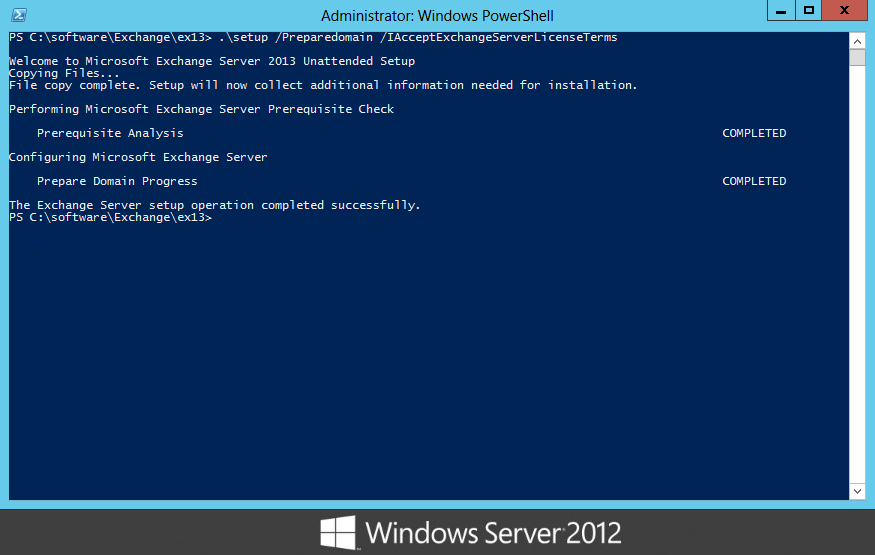
Welcome to Microsoft Exchange Server 2013 Unattended Setup
Copying Files…
File copy complete. Setup will now collect additional information needed for installation.
Performing Microsoft Exchange Server Prerequisite Check
Prerequisite Analysis COMPLETED
Configuring Microsoft Exchange Server
Prepare Domain Progress COMPLETED
The Exchange Server setup operation completed successfully.
PS C:\Software\Exchange\ex13
GUI Installation
Now the fimiliar wizard based Exchange 2013 installation, the following are the steps you would run through.
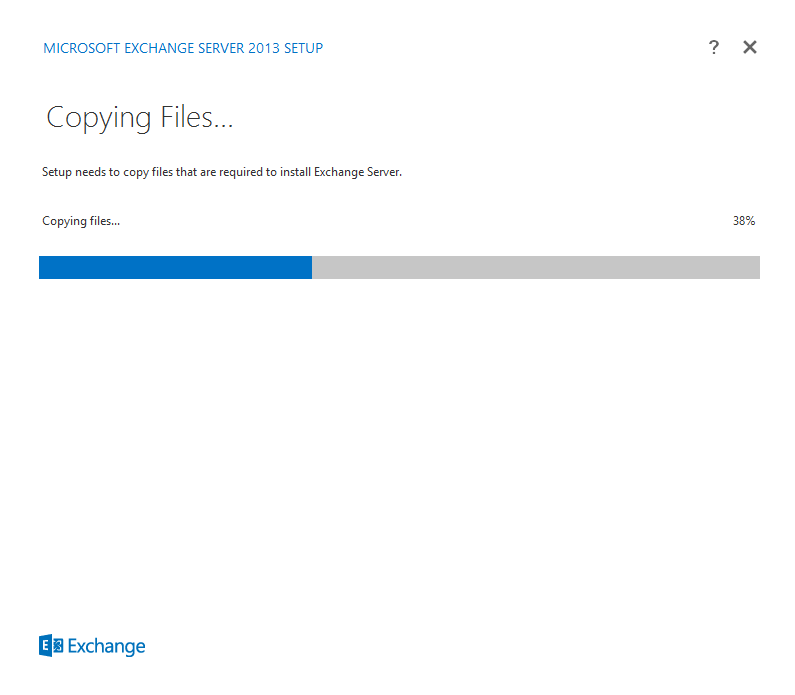
1. Browse to where the setup files are located and double-click on setup.exe

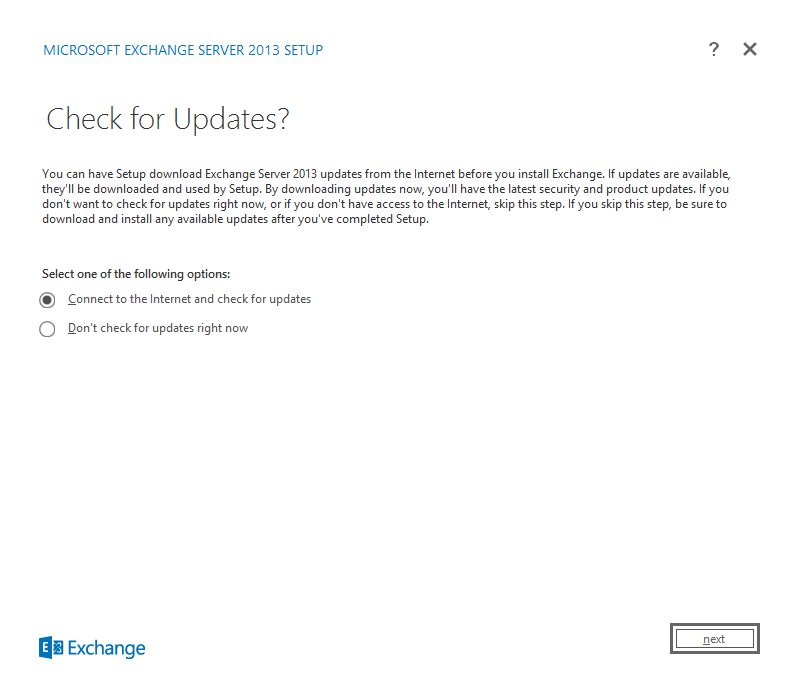
2. On the Check for Updates? page, choose whether you want Setup to connect to the Internet and download product and security updates for Exchange 2013. If you select Connect to the Internet and check for updates, Setup will download updates and apply them prior to continuing. If you select Don’t check for updates right now, you can download and install updates manually later. We recommend that you download and install updates now. Click Next to continue.
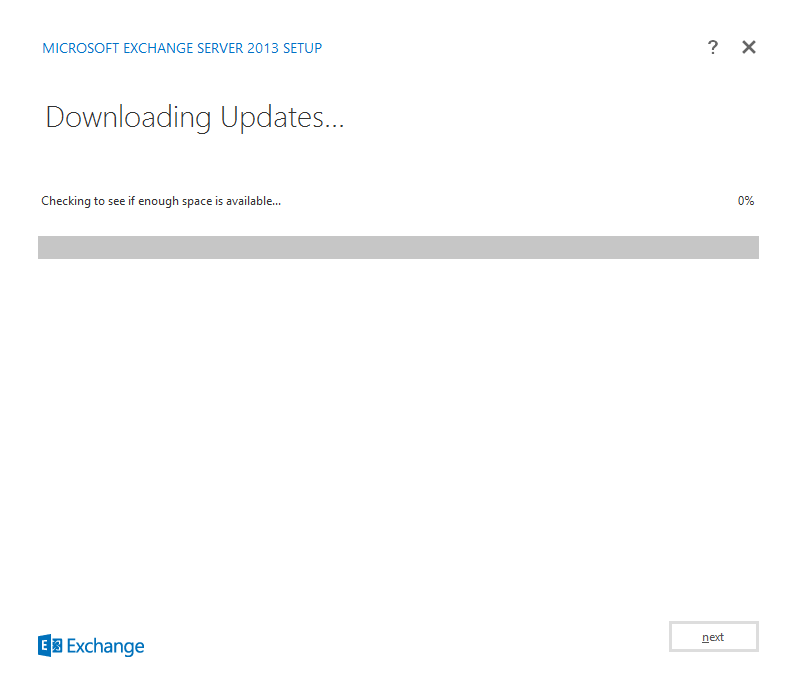
3. The installation will check for Updates
No updates found! Click Next to continue.
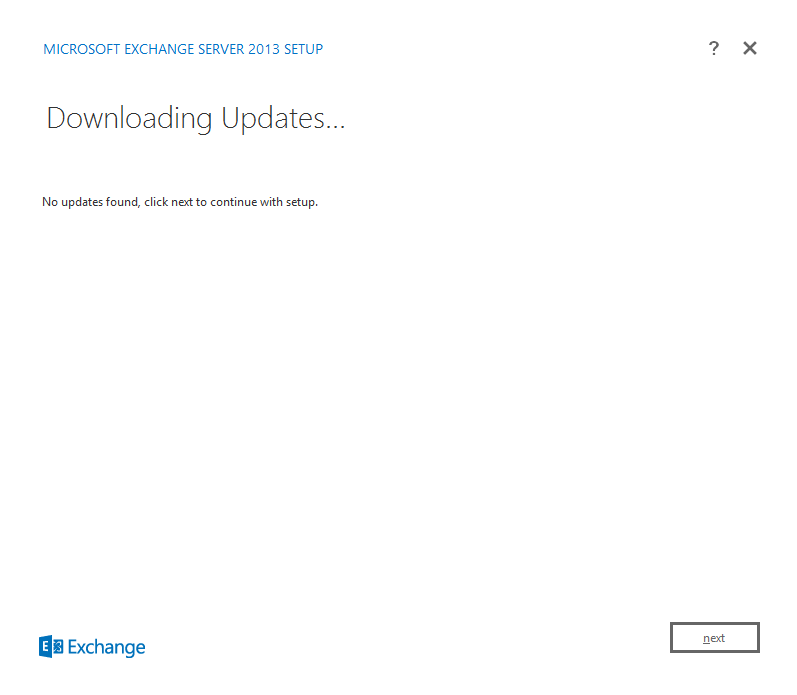
Click Next to continue.
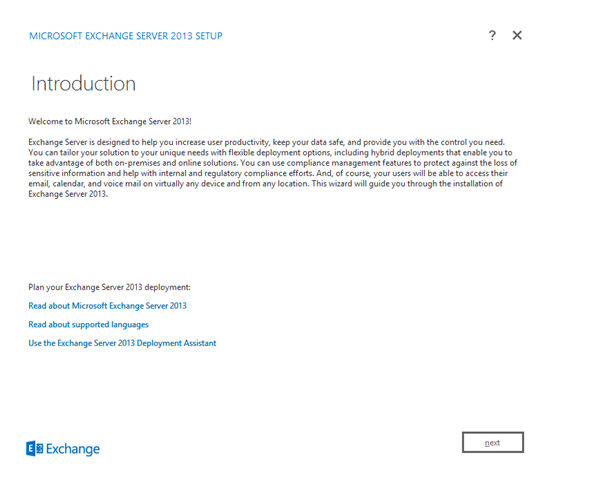
4. The Introduction page begins the process of installing Exchange 2013 into your organization. It will guide you through the installation. Several links to helpful deployment content are listed. We recommend that you visit these links prior to continuing setup. Click Next to continue.
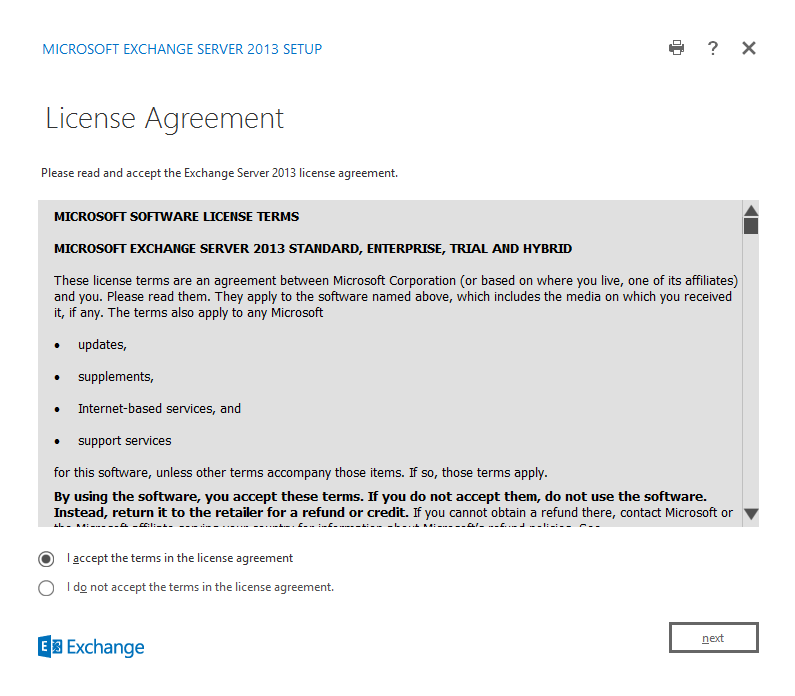
5. On the License Agreement page, review the software license terms. If you agree to the terms, select I accept the terms in the license agreement, and then click Next.
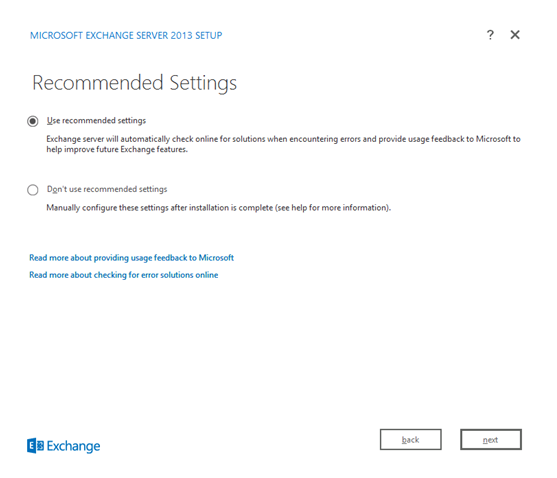
6. On the Recommended settings page, select whether you want to use the recommended settings. If you select Use recommended settings, Exchange will automatically send error reports and information about your computer hardware and how you use Exchange to Microsoft. If you select Don’t use recommended settings, these settings remain disabled but you can enable them at any time after Setup completes.
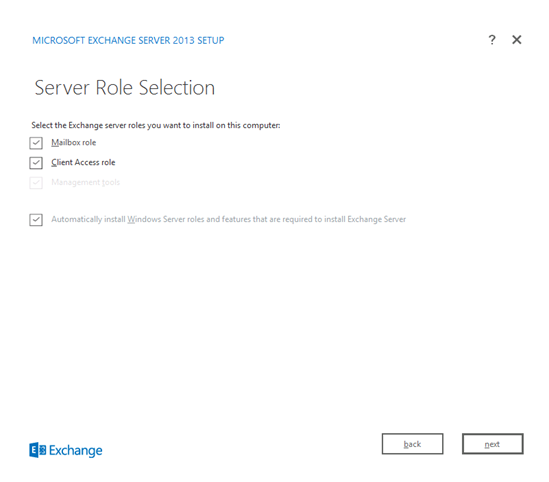
7. On the Server Role Selection page, choose whether you want to install the Mailbox role, the Client Access role, both roles, or just the Management Tools on this computer. You can add additional server roles later if you choose not to install them during this installation. An organization must have at least one Mailbox role and at least one Client Access server role installed. They can be installed on the same computer or on separate computers. The management tools are installed automatically if you install any other server role.
Select Automatically install Windows Server roles and features that are required to install Exchange Server to have the Setup wizard install required Windows prerequisites. You may need to reboot the computer to complete the installation of some Windows features. If you don’t select this option, you must install the Windows features manually. However, in my setup Windows Server roles and features that are required to install Exchange 2013 are already installed, but for strange reasons I selected this option anyway.
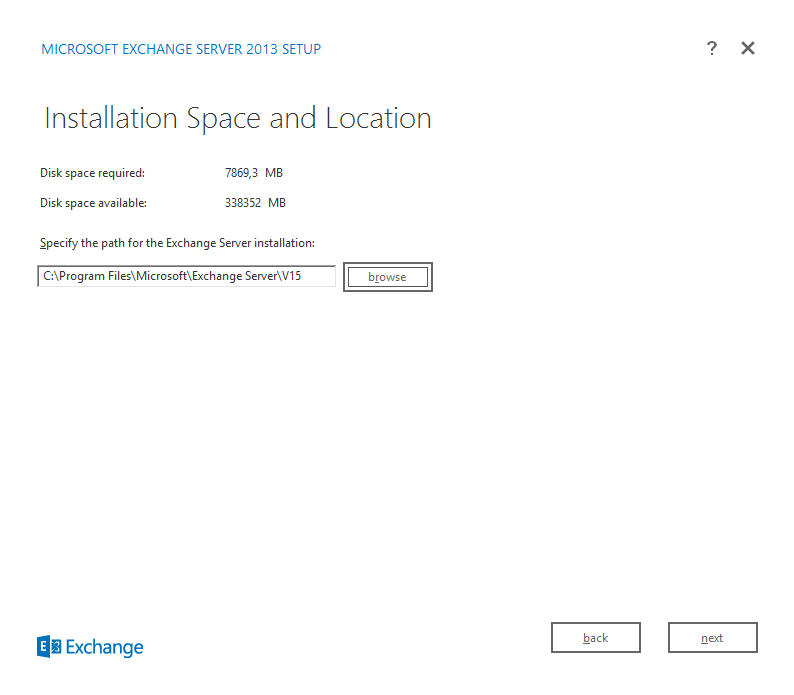
8. On the Installation Space and Location page, either accept the default installation location or click Browse to choose a new location. Make sure that you have enough disk space available in the location where you want to install Exchange. Click Next to continue.
9. If this is the first Exchange server in your organization, on the Exchange Organization page, type a name for your Exchange organization. Click Next to continue.

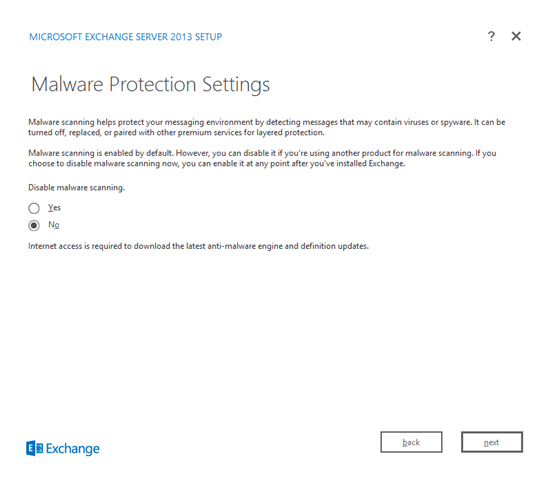
10. If you’re installing the Mailbox role, on the Malware Protection Settings page, choose whether you want to enable or disable malware scanning. If you disable malware scanning, it can be enabled in the future. Click Next to continue.
11. On the Readiness Checks page, view the status to determine if the organization and server role prerequisite checks completed successfully. If they haven’t completed successfully, you must resolve any reported errors before you can install Exchange 2013. You don’t need to exit Setup when resolving some of the prerequisite errors. After resolving a reported error, click back and then click Next to run the prerequisite check again. Be sure to also review any warnings that are reported. If all readiness checks have completed successfully, click Next to install Exchange 2013.

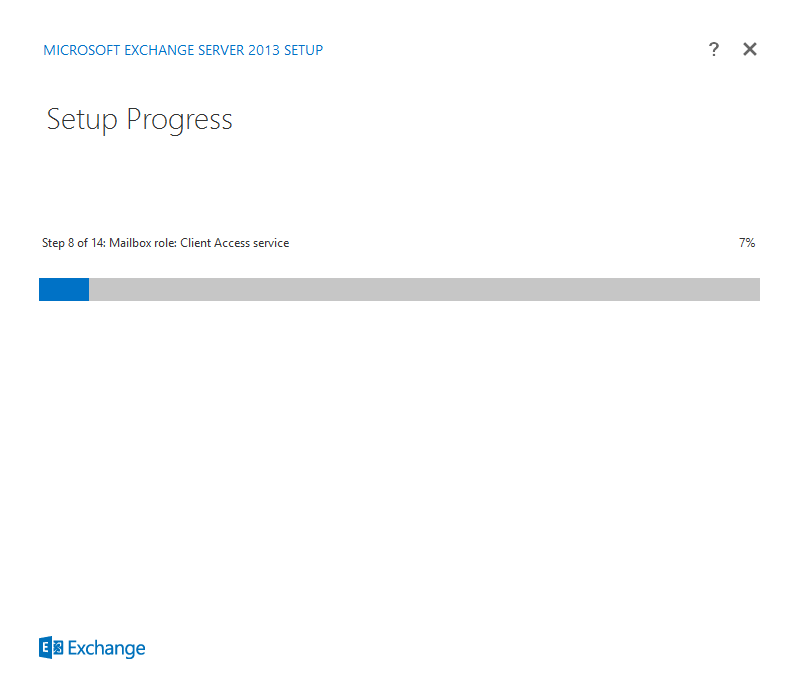
12. Exchange Installation in progress.
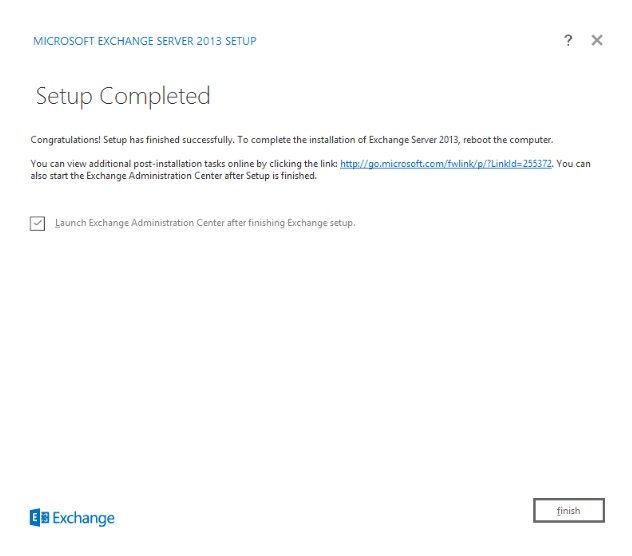
13. Congradulations! Your Exchange 2013 has completed successfully. On the Completion page, click Finish.
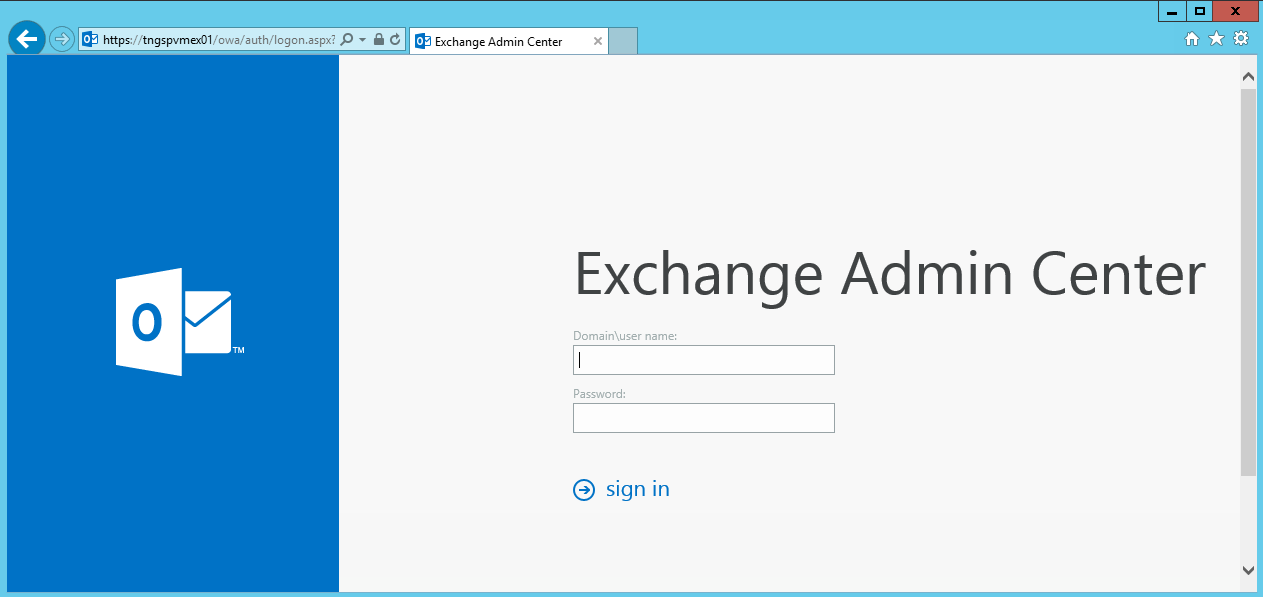
14. If you checked the button to “Lauch Exchange Administration Center after finishing Exchange 2013 setup.” The following login EAC page will open for you to type-in your login details.
Remember to Restart the Server after Exchange 2013 has completed.
After you install Microsoft Exchange Server 2013, it is recommended that you verify the installation by running the Get-ExchangeServer cmdlet and by reviewing the setup log file. If the setup process fails or errors occur during installation, you can use the setup log file to track down the source of the problem.

That’s it! I hope this guide was helpful!
In the next guide I will go through the Exchange 2013 Post-Installation Tasks, to help you configure your new Exchange 2013 for real world use.
Enter Product Key and Configure Mail Flow and Client Access