Previously on How to install VestaCP Nginx Only on ubuntu Server I showed you the installation part. So this article is the next guide about how to configure VestaCP for shared hosting based packages and how to add package on VestaCP server. You can get the basic information on my previous tutorial here.
Step-by-step guide on how to use and add package on VestaCP Server.
Remember the best way to learn any new technical skill, is to play around and see how things work. Get comfortable you’re few steps in right direction. Click HERE to Order Your VPS NOW! so that you can gain the practical experience needed.
Now 50% OFF! VPS hosting solutions optimized for you: Click HERE to Order NOW!
Step One: is “to login to Vesta Control Panel”: https://10.11.1.38:8083/
Then login as Admin and Your Password:
Step Two:Click on Packages and ADDING PACKAGE

Step Three: Adding Hosting Packages
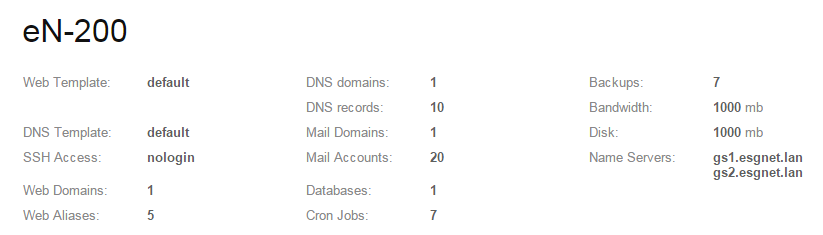
Package Name
eN-200

Web Template
NGINX

Backend Template
PHP5-FPM

DNS Template
BIND9

SSH Access
nologin

Web Domains
1

Web Aliases (per domain)
5

DNS domains
1

DNS records (per domain)
10

Mail Domains
1

Mail Accounts (per domain)
20

Databases
1

Cron Jobs
7

Backups
7
Quota (in megabytes)
1000

Bandwidth (in megabytes)
1000

Name servers
gs1.esgnet.lan
gs2.esgnet.lan

ADD ONE MORE NAME SERVER

Click Add
At the end Your Package will look as below:
That’s it. It is so easy to use VestaCP. In the next guide I will show you how to add Users and assign hosting packages.